EVS Client
EVSClient - Installation & Configuration
External Validation Service Front-end is a Maven project which calls several the web services exposed by the Gazelle tools to validate messages and documents.
Sources
Sources of this project are available on the INRIA GitLab; sources are managed using git. An anonymous access is available if you only want to checkout the sources (read-only access). If you intend to build the tool and to install it on your own server, we recommend you to use a tagged version; not the trunk which is the development branch.
git clone --branch "TAG_VERSION" https://gitlab.inria.fr/gazelle/public/core/evs-client.git
To retrieve the current version of the tool, take a look into the release notes of the project in Jira.
Before compiling the application for the first time, you might want have to update the pom.xml file of the parent project (EVSClient) in order to configure the database connection.
Maven artifact
Each version of the tool is published in our Nexus repository, download the latest release from here. Be careful, this released artifact is configured to connect to a database named evs-client-prod and owned by user gazelle.
Files properties
With the release 5.13.0, EVSClient needs a file to interact with the SSO application.
The file EVSClient.properties has shall be created and save in /opt/gazelle/cas.
The file shall contain the following statements :
- casServerUrlPrefix = https://yourUrl.com/sso
- casServerLoginUrl = https://yourUrl.com/sso/login
- casLogoutUrl = https://yourUrl.com/sso/logout
- service = https://yourUrl.com/EVSClient
Installation
WARNING : From version 5.11.1, datasources have been extracted from the ear. The template file can be found in /src/main/application/datasource in the source or in the file EVSClient-X.X.X-datasource.zip from the nexus. For more informations about how to manage that externalization, please refer to general considerations for JBoss7.
Datasource name : EVSClientDS
Database name : evs-client-prod
Once you have retrieved the archive, copy it to your JBoss7 server in the standalone/deployments directory. Be careful, the file copied in this folder shall be named EVSClient.ear. This means you may have to rename the file before copying it.
EVSClient, when deploying, will try to connect to a Postgresql database named evs-client-prod and owned by the user gazelle. Make sure that the database exists before starting JBoss7.
cp EVSClient-ear-${version}.ear /usr/local/jboss7/standalone/deployments/EVSClient.ear
Users of the EVSClient tool will upload files to be validated on the server, those files are stored in the file system in specific directories. `
Only the root of the main directory is configured in the database. Under debian-like systems, we usually store those files at /opt/EVSClient_prod. A ZIP
file is available at https://gazelle.ihe.net/nexus/index.html#nexus-search;gavEVSClient-ear~5.*(search for the last released EVSClient-X.X.X-dist.zip)
that you can unzip in order to easily create all the required directories, starting at /opt.
wget -nv -O /tmp/EVSClient-dist.zip https://gazelle.ihe.net/nexus/service/local/repositories/releases/content/net/ihe/gazelle/EVSClient-ear/5.0.2/EVSClient-ear-5.X.X-dist.zip
unzip /tmp/EVSClient-dist.zip -d /
To finalize the installation, you must run the script which initializes the application preferences. A SQL script is
available at https://gazelle.ihe.net/nexus/index.html#nexus-search;gavEVSClient-ear~5.*(search for the last released EVSClient-X.X.X-dist.zip), edit it and check its content before running it.
In order to take into account the new preferences, the application SHALL be restarted, once the sql script is executed.
psql -U gazelle evs-client-prod < EVSClient-ear-5.X.X-sql
touch /usr/local/jboss7/standalone/deployments/EVSClient.ear
Deployment
Upgrading an existing installation
Configuration
The application database is : evs-client-prod.
The application uses the database to store:
- The application preferences
- The references to the standard/integration profiles that the user will be able to validate
- The validation services which are available in the tool
- The topbar menu
- The link to the tools which forwards messages/documents to the EVSClient for validation and might query the EVSClient for the result
The following sections explain how to configure the tool.
Application preferences
Users with admin_role role can access the application preferences section through the menu Administration –> Manage application preferences.
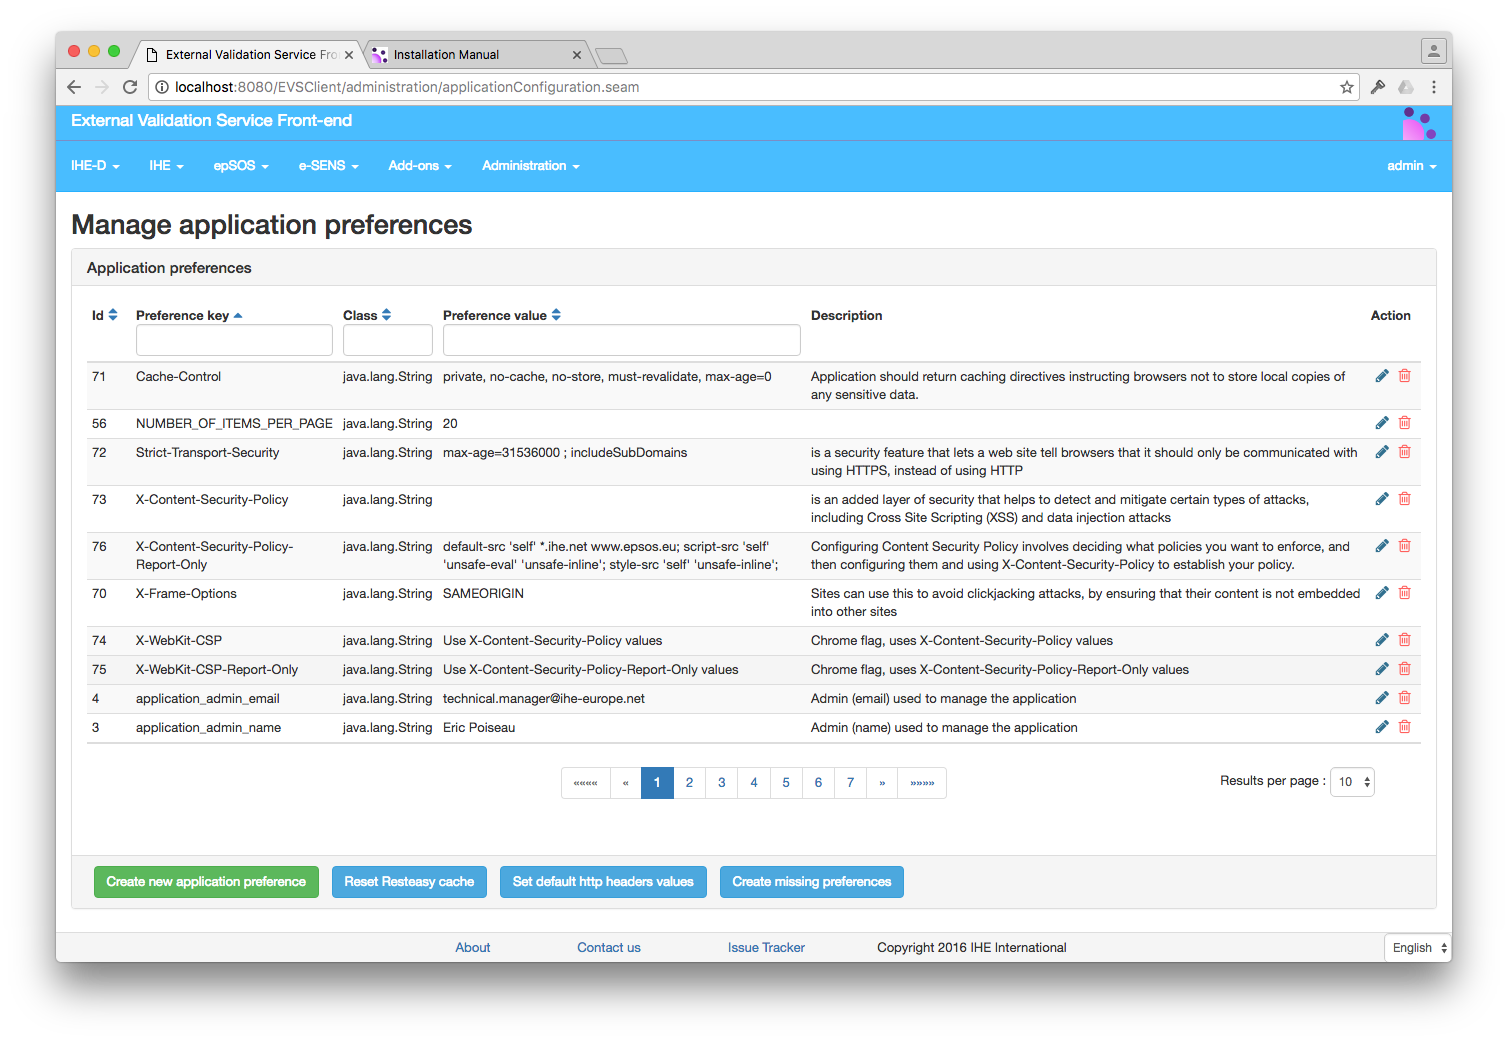
In order to add a new preference click on the green button “Create new application preference”
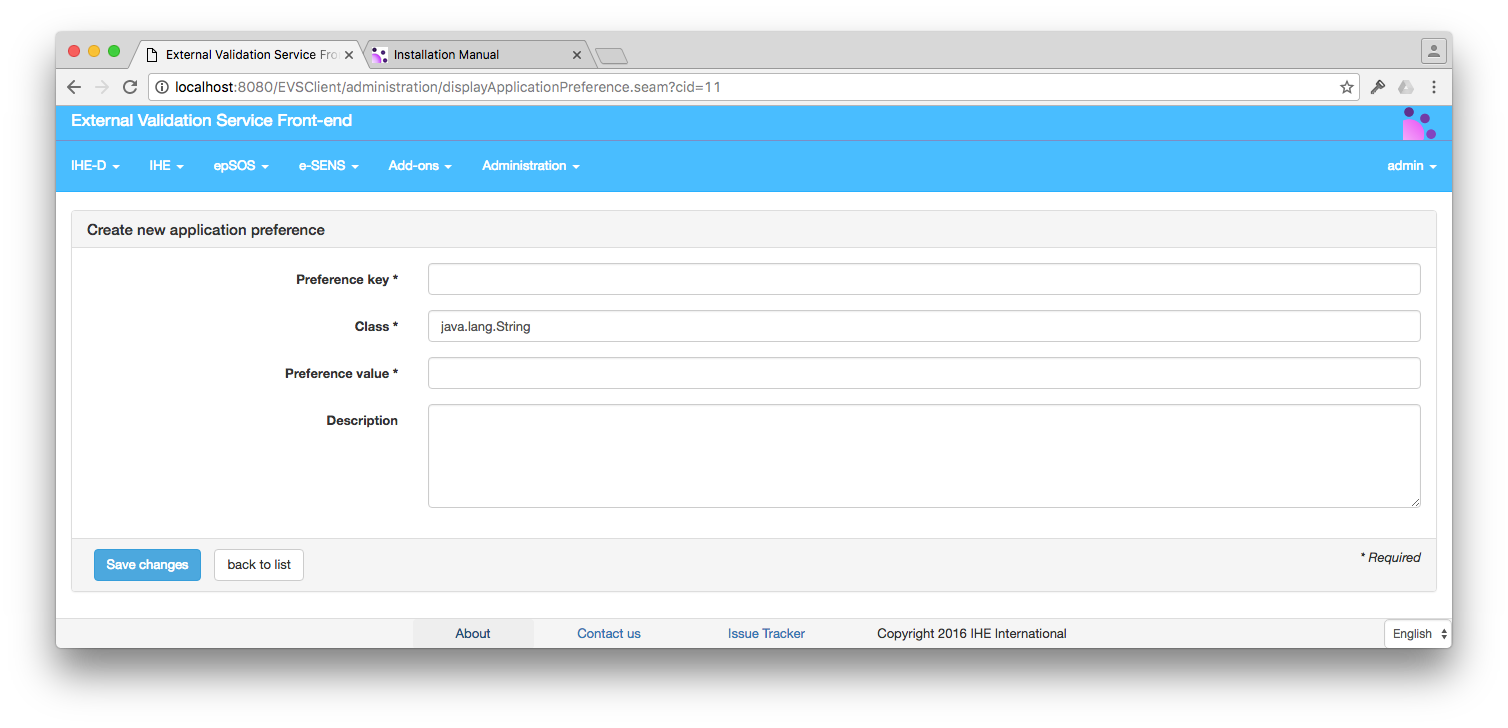
- Preference Key is a one word (no space) key to identify the preference
- Class is the name of the java class used by the application to understand the preference. Possible values are (list is indicative and not exhaustive):
- java.lang.String
- java.lang.Integer
- java.lang.Boolean
- Preference Value is the value of the preference
- Description is a text describing the purpose of the preference
The button Create Missing Preference creates some of the preferences that the application needs to run The button Set default http headers values set the value of the preferences that are needed to set the http header of the pages served by the application to the default value for a good level of security of the application. The button Reset Resteasy cache is use to the reset the values cached by the application for serving rest requests.
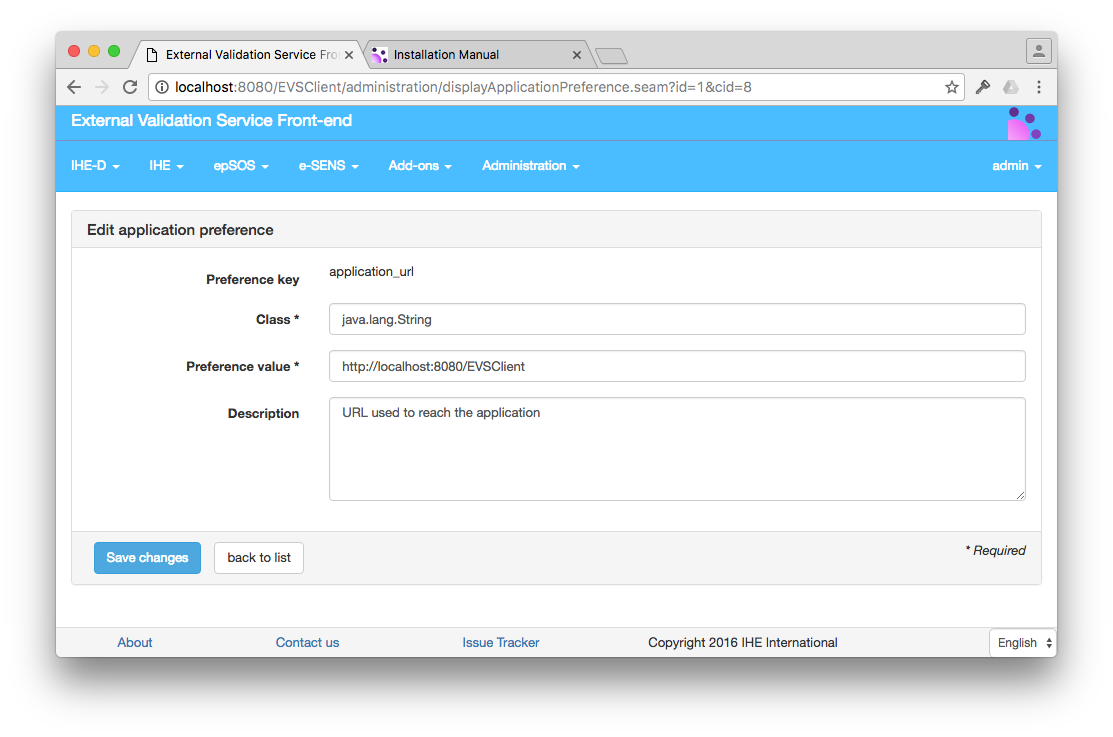
Click on the edit button in order to edit an existing preference
The table below summarizes the preferences which are used by the tool along with their description and default value.
| Variable | Default value | Description |
|---|---|---|
| application_admin_email | contact@evsclient.net | Contact of the person responsible for the application |
| application_admin_name | contact | Person responsible for the application |
| application_database_initialization_flag | database_successfully_initialized | Indicates that the DB has been initialized |
| application_issue_tracker_url | https://gazelle.ihe.net/browse/EVSCLT | URL of the project in the issue tracking system |
| application_url | http://localhost:8080/EVSClient | URL to reach the tool |
| assertion_manager_url | https://gazelle.ihe.net/AssertionManagerGui | URL to the Gazelle Assertion Manager Application |
| atna_repository | /opt/EVSClient_prod/validatedObjects/ATNA | Where to store ATNA messages |
| cas_enabled | false | Indicates authentication mechanism to use |
| cas_url | Not defined | URL of the CAS service |
| cda_repository | /opt/EVSClient_prod/validatedObjects/CDA | Where to store CDA documents |
| check_CDA_PIDs_script_localization | http://localhost/ruleScript.js | URL where the script with different CDA rules are stored |
| dicom_repository | /opt/EVSClient_prod/validatedObjects/DICOM | Where to store DICOM files |
| dicom_scp_screener_xsl | dicom/TestDicomResults.xsl | XSL used to display Dicom SCP Screener results |
| display_SCHEMATRON_menu | false | Indicates if we need a link to the list of schematrons for download |
| dsub_repository | /opt/EVSClient_prod/validatedObjects/DSUB | Where to store DSUB files |
| epsos_repository_codes | /opt/EVSClient_prod/bin/EpsosRepository | Path to epsos codes for epsos-cda-display-tool |
| gazelle_hl7v2_validator_url | https://gazelle.ihe.net/GazelleHL7Validator | Path to Gazelle HL7 Validator |
| gazelle_home_path | /opt/EVSClient_prod | Absolute path to Gazelle home. Here is where are stored generated data, reports and other required binaries for application |
| hl7v3_repository | /opt/EVSClient_prod/validatedObjects/HL7v3 | Where to store HL7v3 messages |
| hpd_repository | /opt/EVSClient_prod/validatedObjects/HPD | Where to store HPD messages |
| include_country_statistics | true | Authorize or not the application to query geoip to retrieve the countries the users are from |
| ip_login | true | Indicates authentication mechanism to use |
| ip_login_admin | .* | Pattern to grant users as admin based on their IP address |
| monitor_email | test@test.com | Contact of the person who monitors the application |
| number_of_segments_to_display | 40 | Number of segment to display when displaying HL7v2 messages |
| object_for_validator_detector_repository | /opt/EVSClient_prod/validatedObjects/validatorDetector | path to the repository where object for validator_detector are stored |
| pdf_repository | /opt/EVSClient_prod/validatedObjects/PDF | Where to store PDF files |
| reports_path | reports | Path to jasper reports in gazelle home |
| root_oid | 1.2.3 | Root of the OID used to uniquely identify validation requests |
| saml_repository | /opt/EVSClient_prod/validatedObjects/SAML | Where to store SAML assertions |
| show_logs_from_colleagues | false | Set to true if you would like users from the same organization to share logs |
| svs_repository | /opt/EVSClient_prod/validatedObjects/SVS | Where to store SVS messages |
| time_zone | Europe/Paris | Time zone to display time to users |
| tls_repository | /opt/EVSClient_prod/validatedObjects/TLS | Where to store certificates |
| x_validation_editor | true | if true the Cross validator editor can be called from the menu |
| x_validation_enabled | false | Set to true to enable the Cross Validation components |
| x_validation_validator | true | if true the Cross validator validation can be called from the menu |
| xds_repository | /opt/EVSClient_prod/validatedObjects/XDS | Where to store XDS messages |
| xdw_repository | /opt/EVSClient_prod/validatedObjects/XDW | Where to store XDW messages |
| xvalidation_root_oid | 1.1.1.1.1. | Root OID for Cross Validation reports |
| xvalidator_directory | /opt/EVSClient_prod/x_validation | Path to Cross Validation files |
| xvalidator_xsl_url | https://gazelle.ihe.net/GazelleXValidatorRuleEditor/stylesheet/gazelleXValidator.xsl | URL to the XSL stylesheet used by the Cross Validator for the transformation of the results |
Application URL
One of the first preference to set is the URL to the application. If not configured correctly you may not be able to access the application once it is deployed. You may also be unable to change the preferences from the GUI.
update cmn_application_preference set preference_value  = 'http://localhost:8080/EVSClient' where preference_name ='application_url';
update cmn_application_preference set preference_value  = '.*' where preference_name ='ip_login_admin';
Login
There is no user database in the EVS Client application. The application can be configured to work with a Jasig CAS service, in which case the users will be authenticated through the CAS. The role of the users will then be provided by the CAS service.
Set of SQL commands to activate the CAS authentication. Make sure to use the actual URL to your CAS server in the following example.
update cmn_application_preference set preference_value  = 'false' where preference_name ='ip_login';
update cmn_application_preference set preference_value  = 'true' where preference_name ='cas_enabled';
update cmn_application_preference set preference_value  = 'http://localhost:8888/cas/' where preference_name ='cas_url';
If no CAS is available there is a degraded mode, using an IP base login. If this mode is activated, then a click on the login button the
application menu bar will grant the role admin to the users which matches the regular expression of the preference ip_login_admin
Set of SQL commands to activate the IP address based authentication.
update cmn_application_preference set preference_value  = 'true' where preference_name ='ip_login';
update cmn_application_preference set preference_value  = 'false' where preference_name ='cas_enabled';
update cmn_application_preference set preference_value  = '.*' where preference_name ='ip_login_admin';
References to standards
What we call a referenced standard in the EVS Client tool is an entry which indicates the underlying standard or integration profile implemented by the system which produces the documents and/or messages that the tool is able to validate. We use this concept to structure both the Java code and the graphical user interface.
A referenced standard is defined by a name, optionally a version and an extension. Then each entry in the database is given a unique label and we can also provide a name to be displayed to the user in the drop-down menus and a description explaining what is the standard and what the tool is going to validate.
Note that a pre-defined list of standard names is available and matches the standard for which a validation service client has been implemented within the tool.
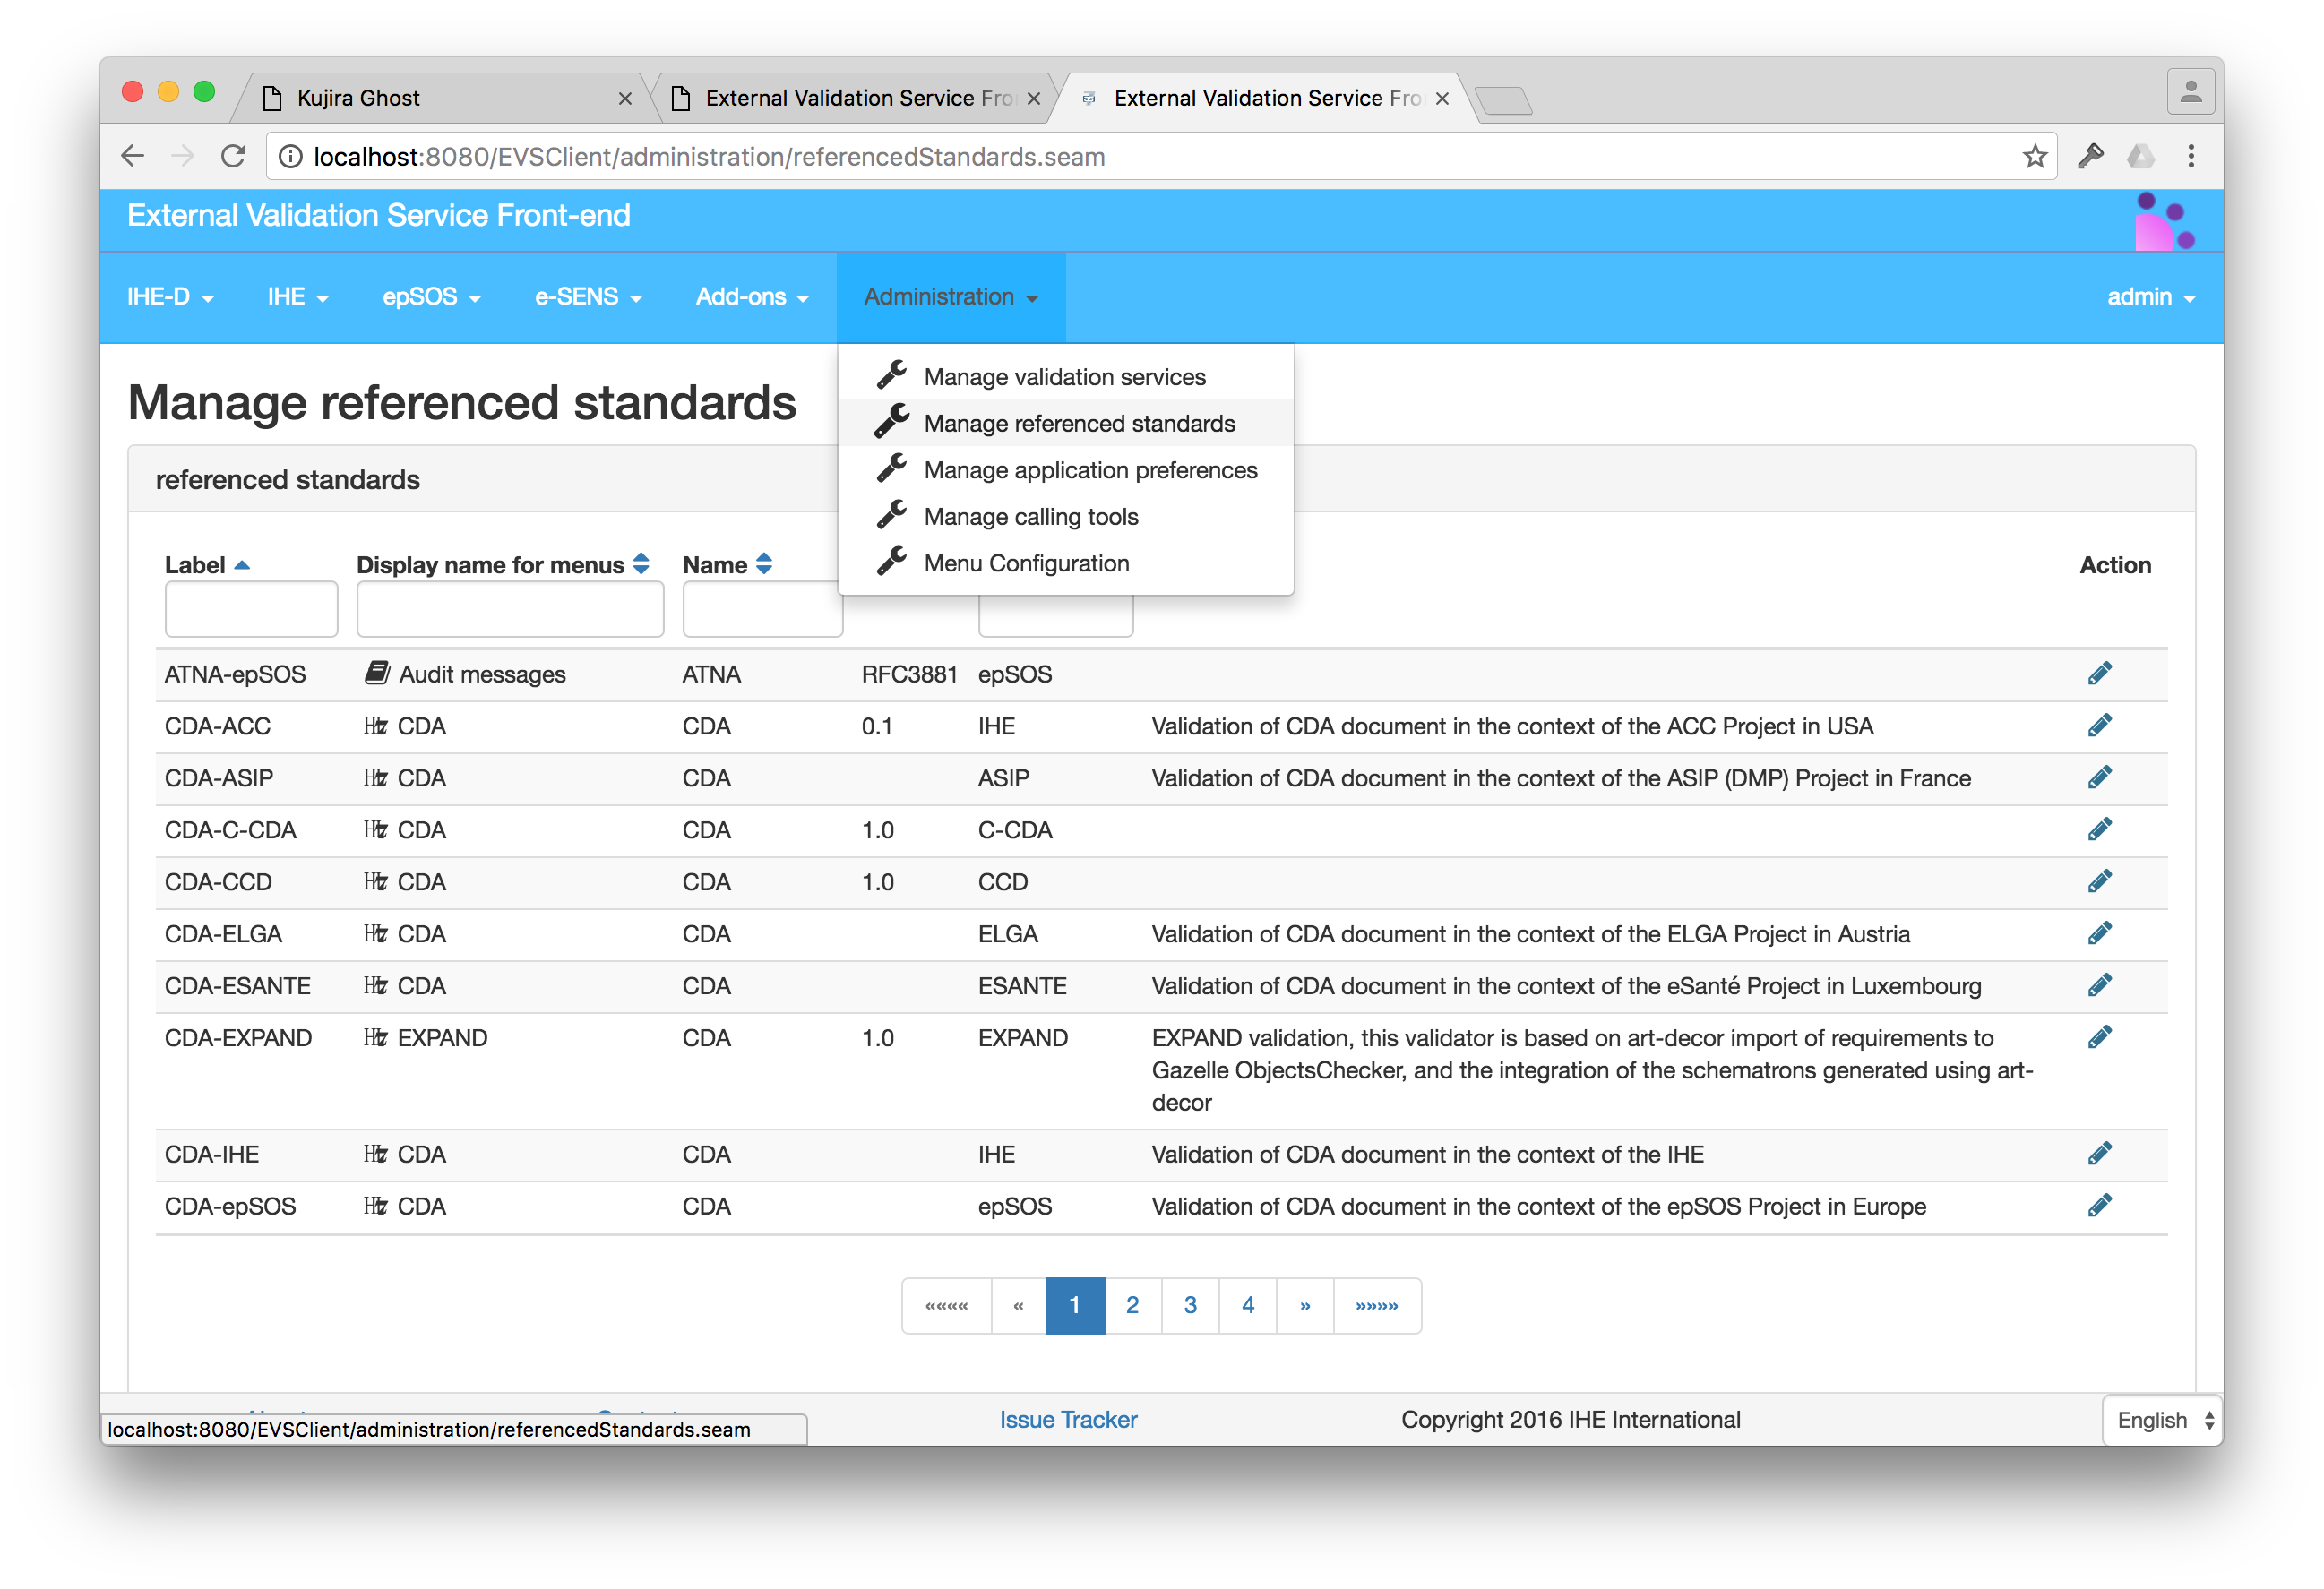
Users with the administrator role can access this section of the tool to configure the standards from Administration –> Manage referenced standards menu entry. The page lists the standards already defined within the tool. Users can edit existing entries or add new ones.
Currently available standards are HL7v2, HL7v3, CDA, TLS (stands for certificates), DSUB (metadata), XDS (metadata), XDW (metadata), HPD (messages), SVS (messages), WADO (requests), DICOM, SAML (assertions), ATNA (Audit messages).
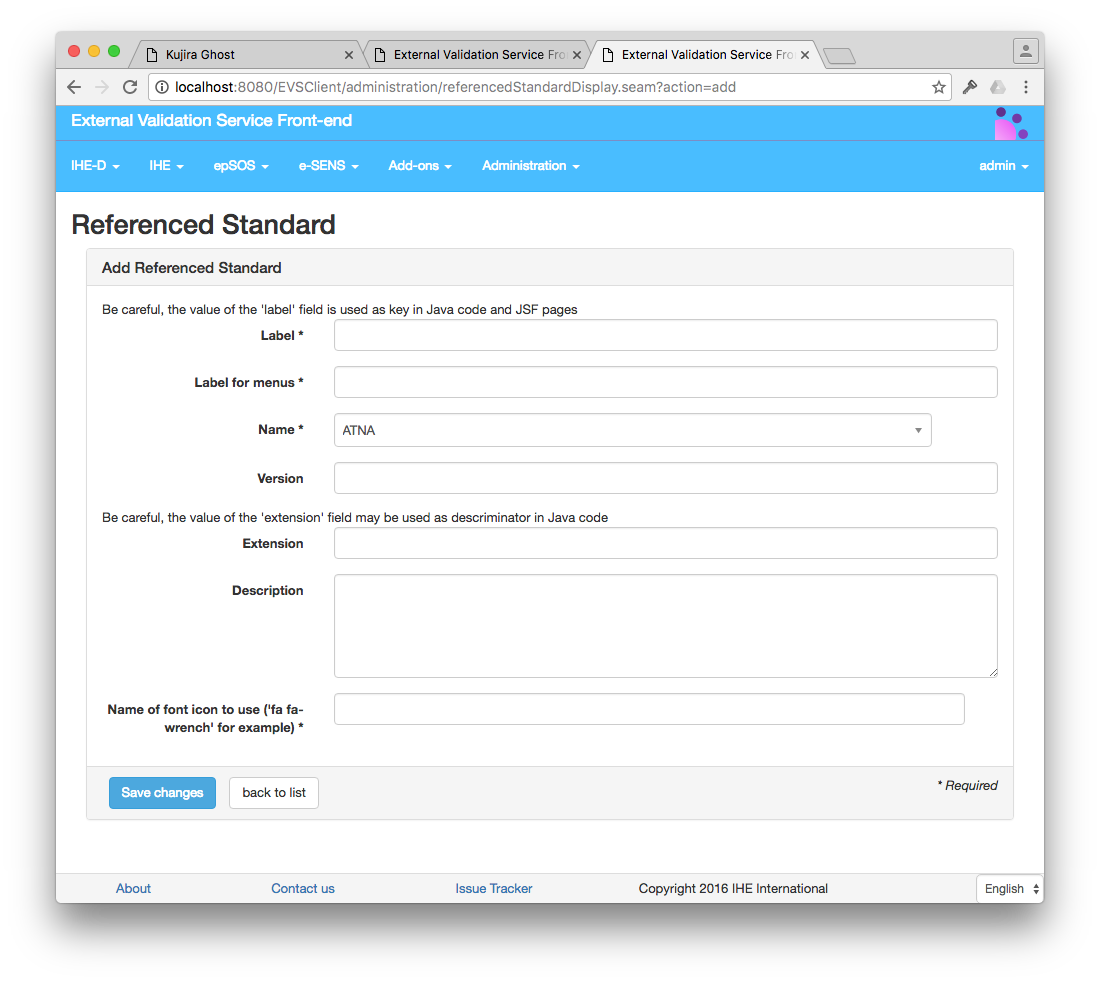
Add a reference to a standard
When creating a new standard, make sure you use a unique label. In addition, check the spelling of the extension, it might be used by the tool to query for the list of available validation methods. Note that you can also provide a link to the image to be used in the drop-down menus. For XML-based documents/messages, you can provide the list of the XML stylesheets to use to nicely display the document/message to the user.
- Label contains a label that describe the referenced standard. For example CDA-IHE for a reference to CDA in the IHE context.
- Label for Menu contains the label that will be displayed in the menu that uses this entry. For example CDA, and the user will see CDA in menus that uses that reference.
- Name is name of the referenced standard to use. This a value picked in a list box.
- Version this is a free text field to describe the version of the referenced standard that is used.
- Extension this is a label that describes the context in which that standard is used. epSOS for CDA validation in the context of the epSOS project. This value might be used as a key to query the validation service for the list of available validation methods.
- Description is a free text field that may contain the description of the referenced standard.
- Name of the icon is the font character name to use for the icon. This is a font awesome name
fa fa-book. See here for a complete list of available icons.
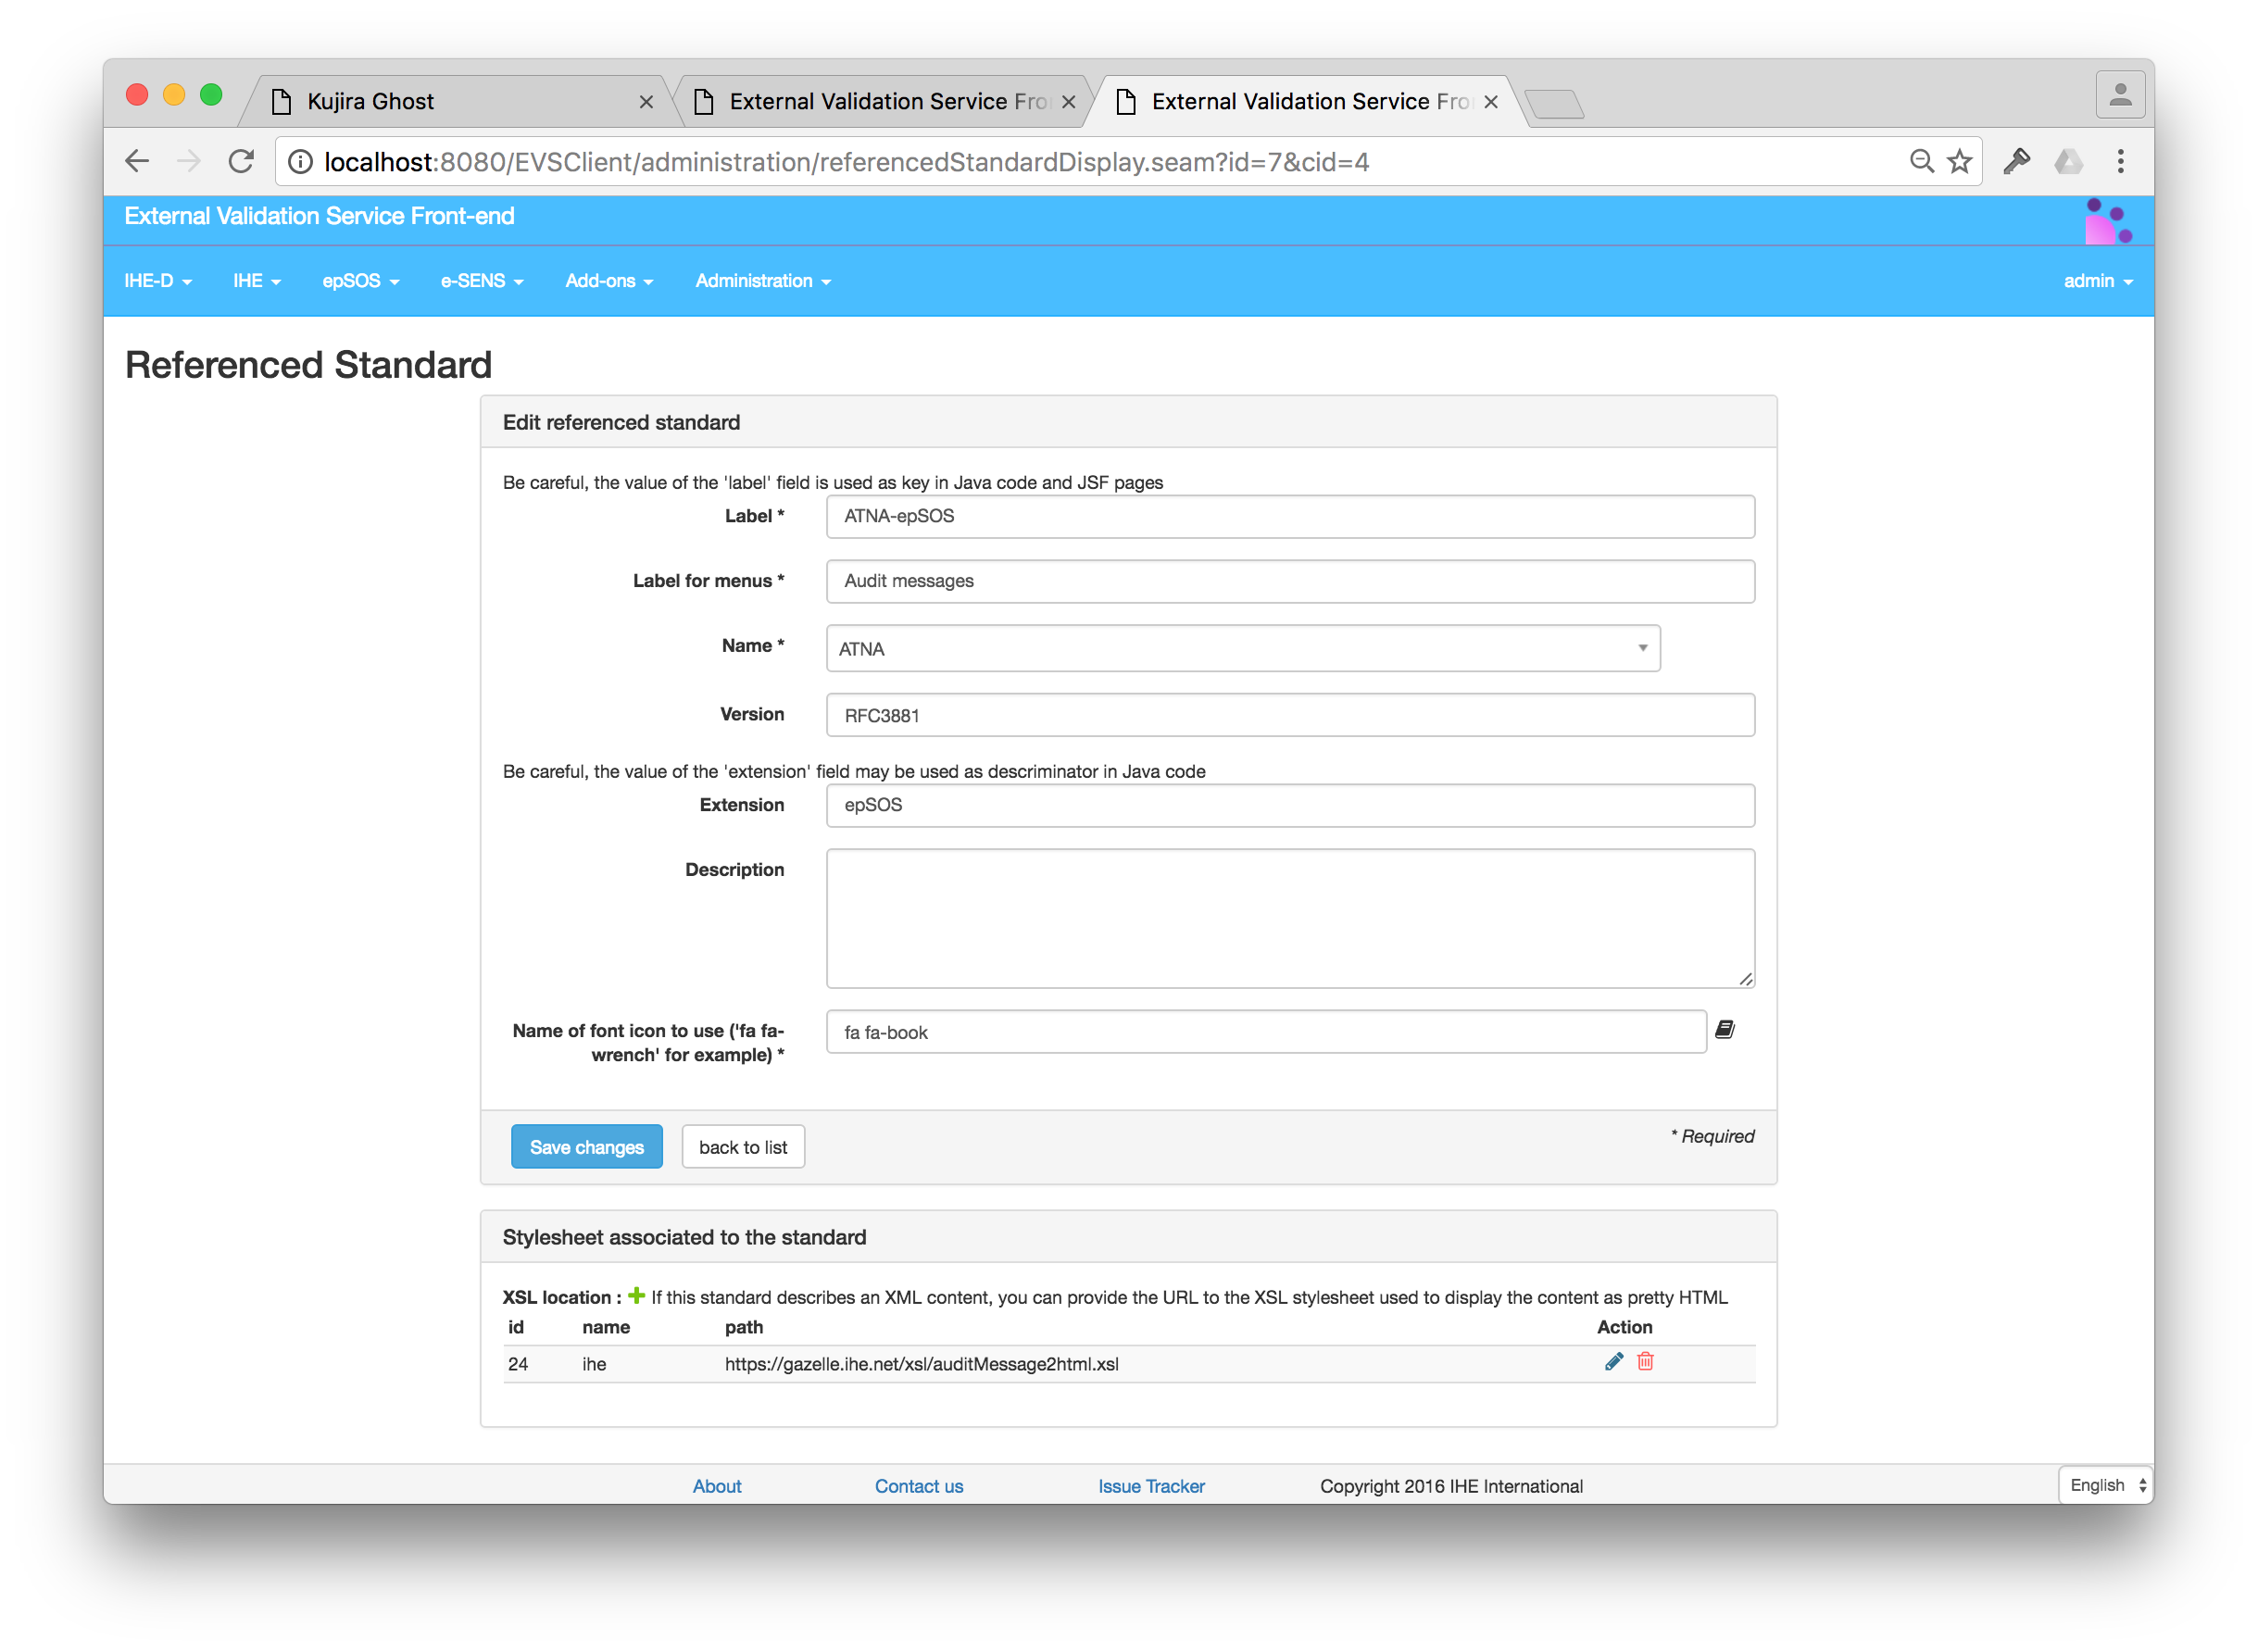
Edit an existing reference to a standard
Editing an existing referenced standard uses slightly the same form as the one described in the previous section. In addition, the user has the possibility to add the link to a XML Stylesheet that can be used to render the XML document validated by the validation tool in that context of this referenced standard. Note that is the validated document is not an XML file, adding references to XML stylesheet here does not make sense.
Click on the green plus sign in order to add a link to a stylesheet.
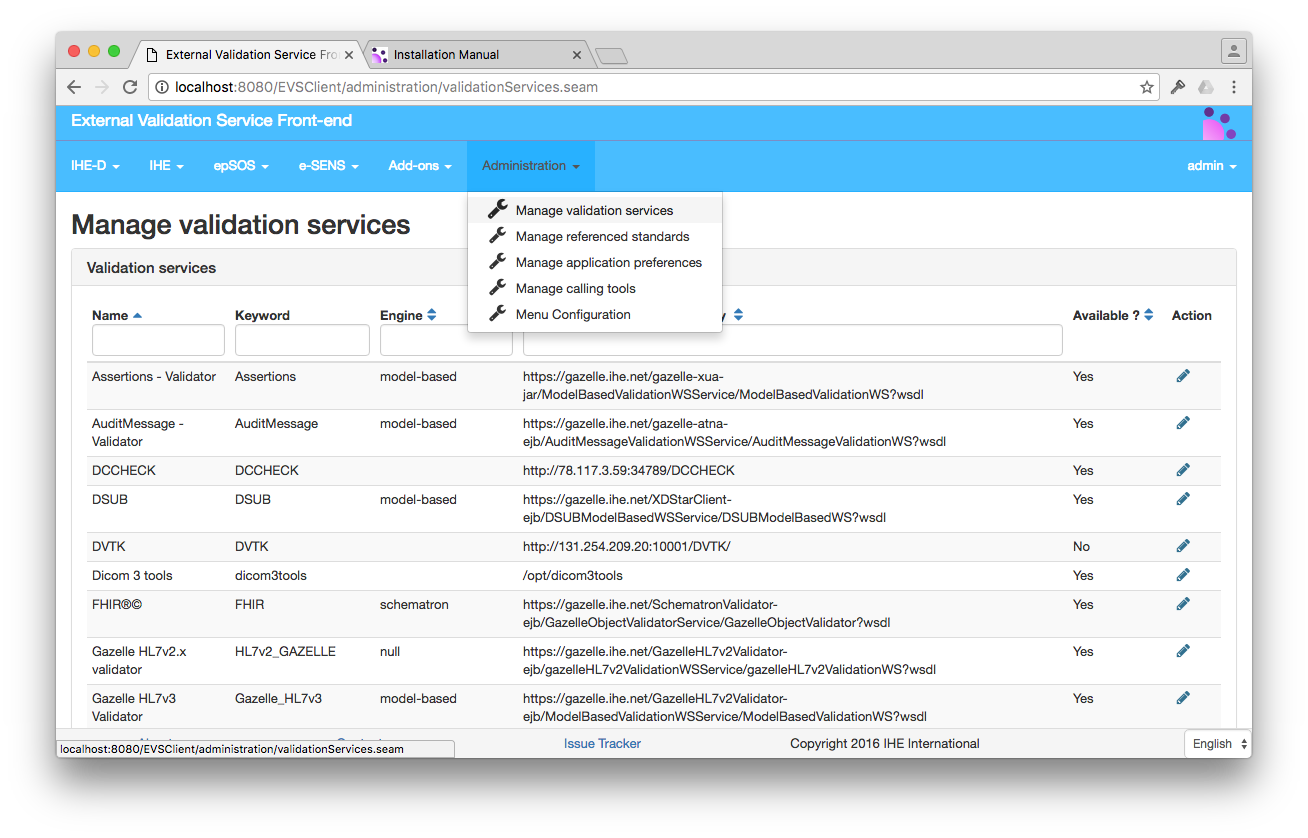
Validation services
A validation service in the context of the EVSClient tool is either a web service exposed by another tool or a binary executed directly on the server or even a JAR library called by the tool. An entity has been created in the tool to store all the information about those services. It makes easier the management of the services and allows a different configuration depending on the location of the EVSClient tool.
Going to Administration –> Manage validation services, the administrator will access the list of all the validation services which are declared and used by the application. Each entry can be edited. Administrator of the application can also create new entries, in order to declare new validation services
Adding a validation service
Click on the button “Create new validation service” in order to acces the form to create a new service entry in EVSClient.
When defining a validation service you need to provide:
- Name is the name of the services to be added.
- Keyword is the keyword for the service
- Engine is the type of the engine used. Can be one of the following values : schematron, model-based, hapi or null.
- schematron if the validation service that is called is of type Schematron
- model-based if the validation service that is called is of type model based (Gazelle Objects Checker)
- hapi if the validation service that is call uses HAPI
- null otherwise
- Target endpoint or path to the binary Place here the URL to the endpoint (i.e. https://gazelle.ihe.net/XDStarClient-ejb/ModelBasedValidationWSService/ModelBasedValidationWS?wsdl. Note that we are expecting the wsdl at the end of the url. In case the service is not actually a service, but a tool on the server hosting the EVS Client application, then provide the path to the executable.
- XSL for transforming results (URL) is the link to the XSL to be used to display the validation report.
- Description a field to provide documentation, information about the service.
- Provider is a free text field intended to differentiate the different validation service providers.
- Name of Jasper Report is a field that indicated the relative path to the Jasper report used to create a PDF validation report. The absolute path will be obtain by concatenation of gazelle_home_path preference value, reports_path preference value and the value of the field. The full path will be display below the form field to the user.

Jasper reports can be found in the EVS Client sources. To be able to use them to generate PDF validation reports, use the following command in the path defined by gazelle_home_path preference :
git clone https://gitlab.inria.fr/gazelle/public/core/evs-client.git
cd EVSClient/EVSClient-ear/src/main/dist/opt/EVSClient_prod/reports
If you want to use any other path than the default /opt/EVSClient_prod/reports path, be sure to set the appropriate values to gazelle_home_path and report_path preferences in your application.
Services can be enabled or disabled using the check box “is available ?”. When the check box is checked the service can be used and added to a menu. Enabling/Disabling services can be convenient when adding a replacement to an existing service. It allows the user to prepare its configuration without disturbing the running system.
The service can also be marked as supporting compression with the “support compression ?” checkbox. A validation service that supports compression will use zip format to transport the document and the result of the validation.
Click on the save button.
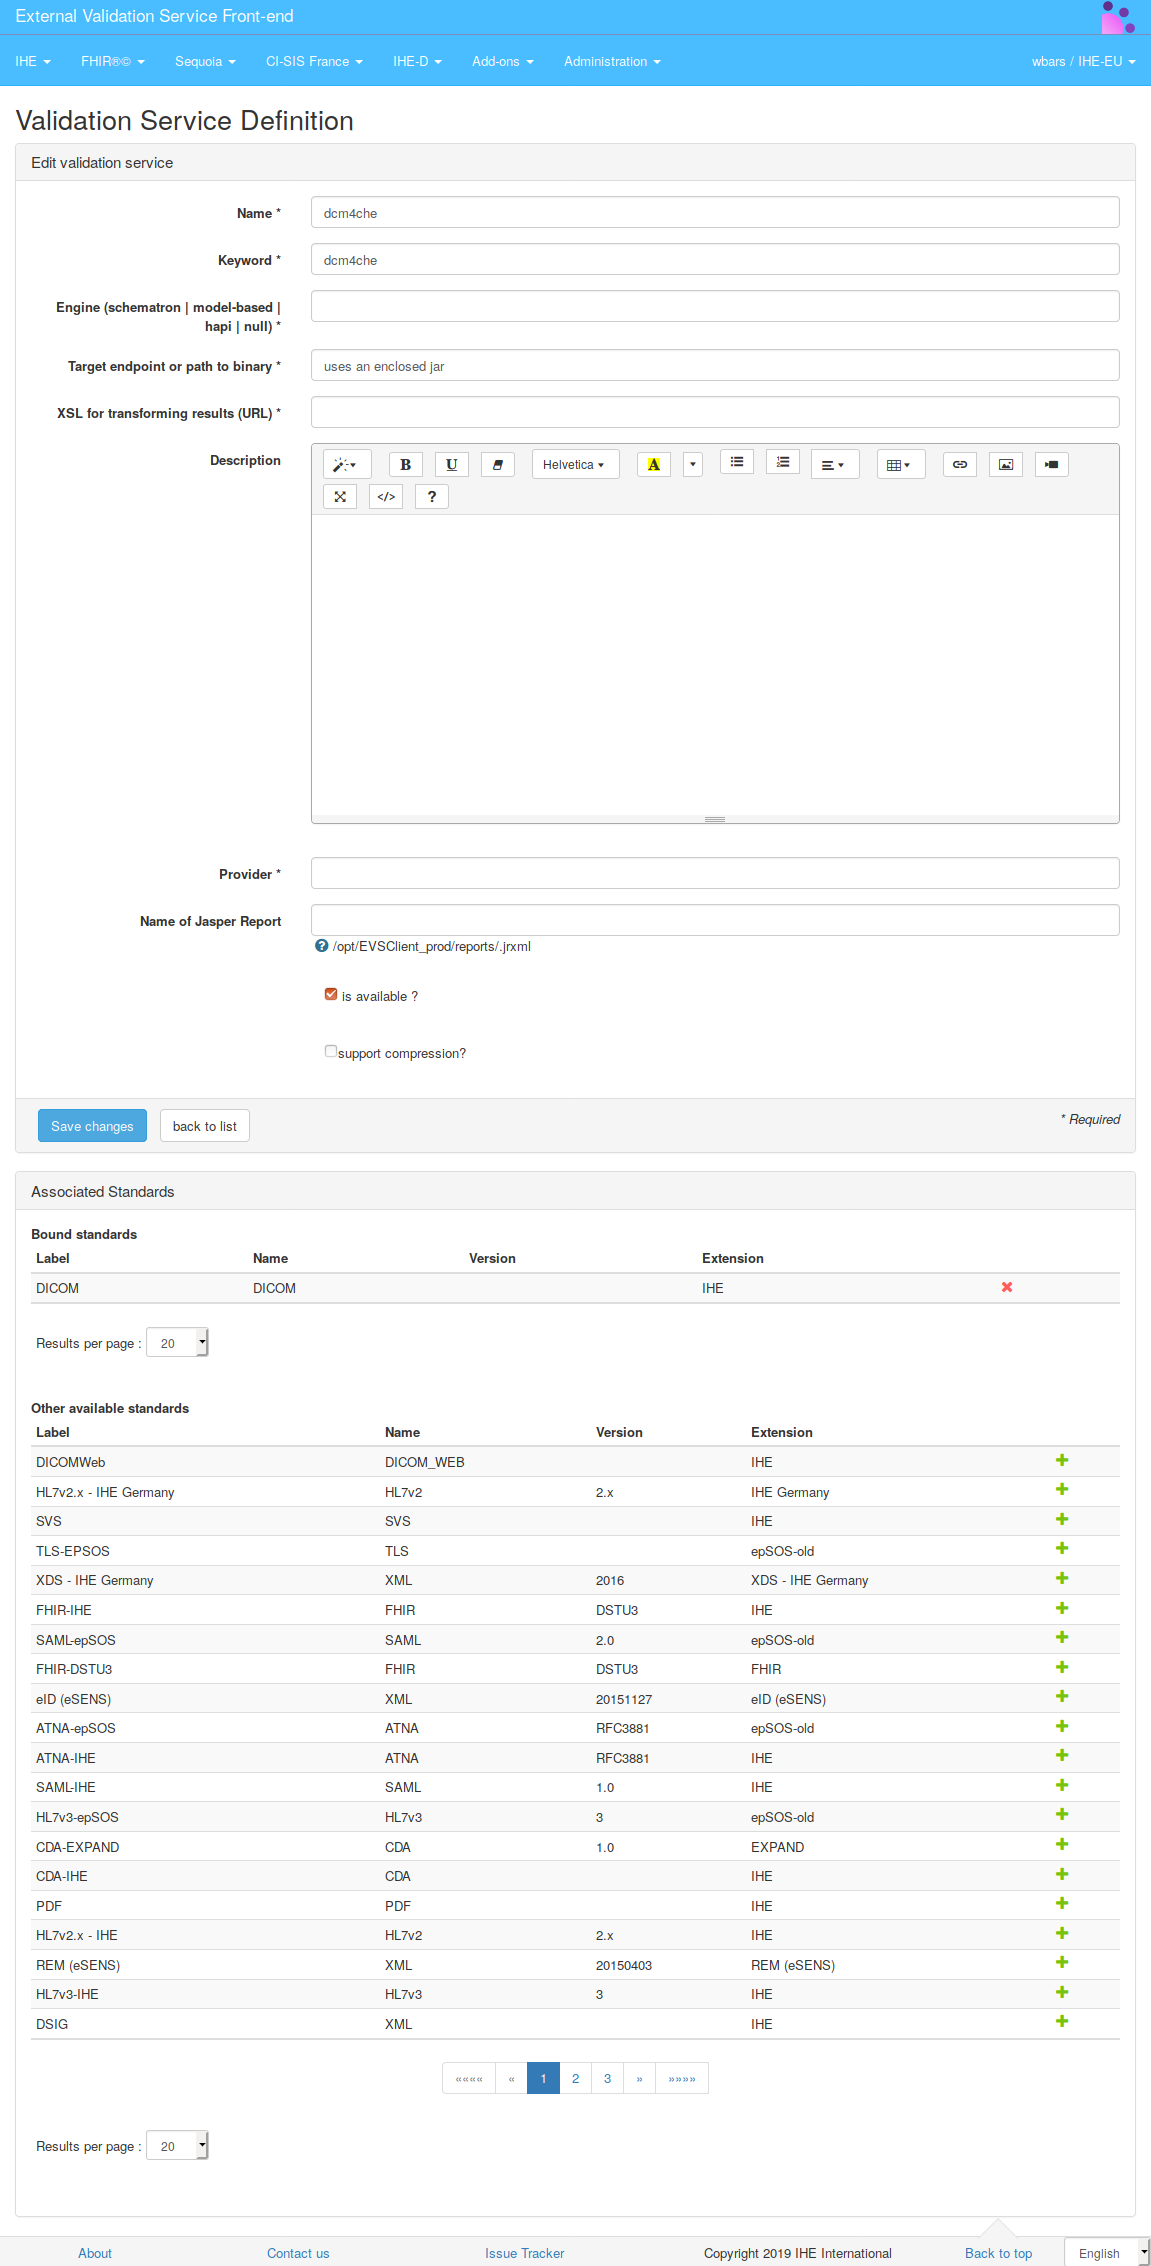
The next step in the addition of a validation service is to associate standards to the newly created services.

Configuring the top bar menu
A menu bar is made of two kinds of entities, the menu groups which are the menu entries displayed in the top bar and the menu entries which are the entries displayed in the drop-down list. The top bar menu of EVSClient is built using a list of menu groups stored in the database. Administrator users can update this list from the page accessible at Administration –> Menu configuration. On this page are listed all the menu groups defined for this instance of the tool.
A menu group is defined by:
- a label and an icon (path to the icon can be relative to the application or can be an external reference)
- its order on the page
- the list of referenced standards which will be available from this menu group
- a boolean which indicates whether or not displaying the menu group
For each standard listed in the menu group, the icon will be the one defined at standard level. For each menu (except for DICOM one), the sub menus will be “validate”, “validation logs” and “statistics”. Links to these sections are automatically built from the standard name and extension.
Calling tools
Some tools of the Gazelle testbed send validation requests to EVSClient. To do so, we use servlets and then we may want to send back the result to the calling tool. We assume that not only one tool will send such requests, we maintain a list of tools which are likely to redirect the user to the EVS Client.
This list is accessible under Administration –> Calling tools.
For each tool, we need an OID which uniquely identifies the instance of the tool and the URL used to send back results. Currently two categories of tools can use the EVSClient in this way : Gazelle proxy instances and Gazelle Test Management instances; you need to precise it to the tool so that the EVS Client knows how to send back results (if the feature is available in the calling tool).
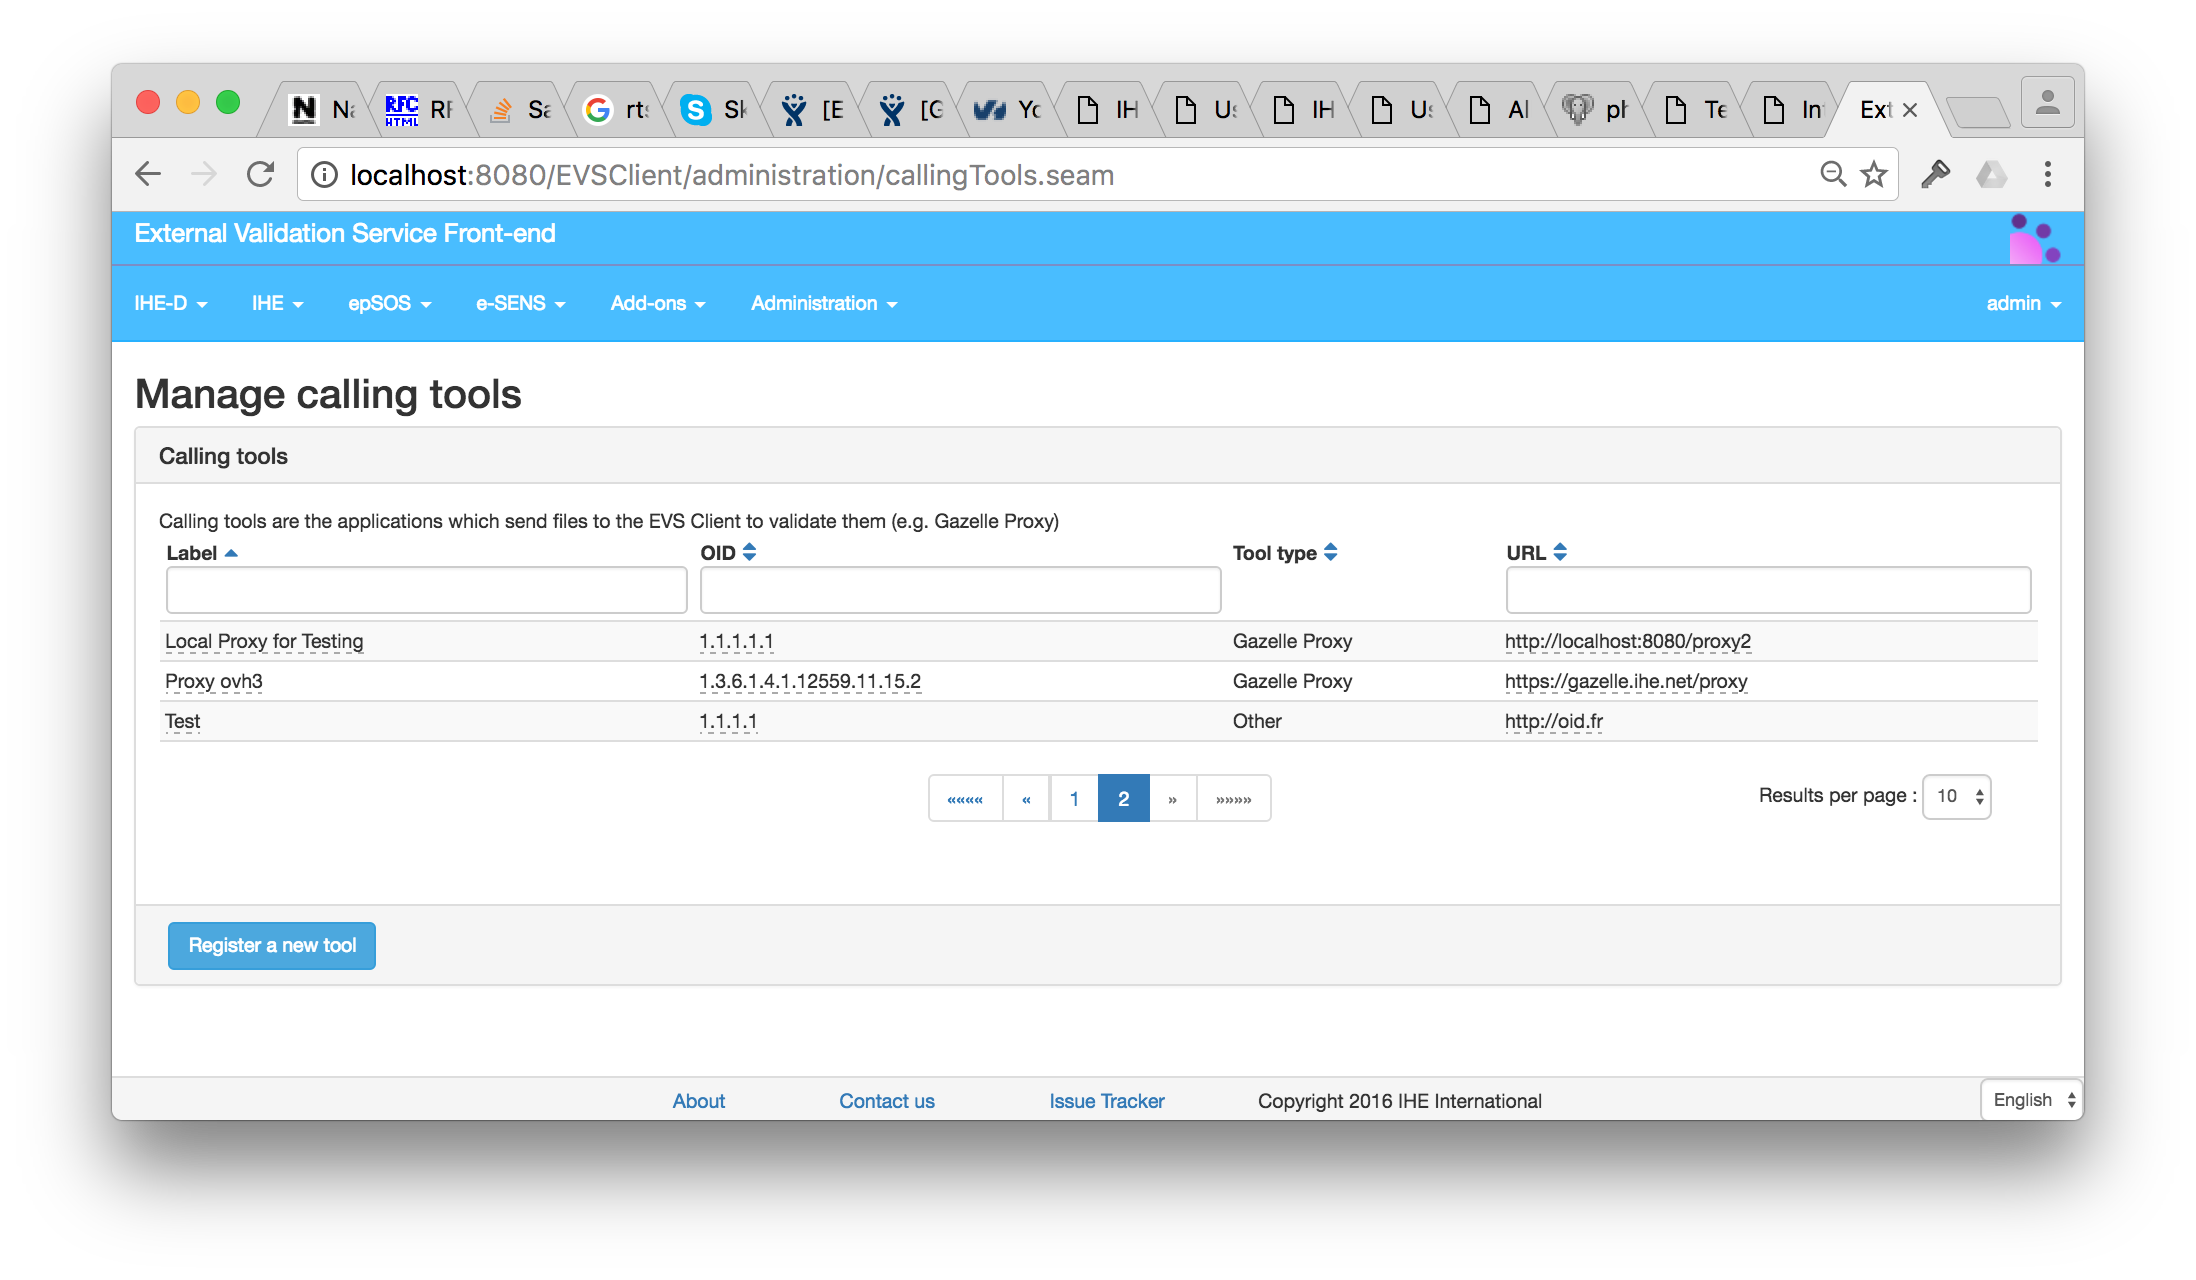
It is possible to add new calling tools. There are 3 types of tools known by EVS Client:
- PROXY or Gazelle Proxy
- TM or Gazelle Test Management
- OTHER for unknown applications.

Dicom validator installation
Dicom3Tools
If a DICOM validation is wished, then Dicom3Tools needs to be installed on the host machine.
The following instructions are for a linux system based on the apt package system. Any other distribution may find instructions for installation of the tool from David Clunie. This is not the scope of this document to provide installation instructions for all platforms.
sudo apt-get install g++
sudo apt-get install xutils-dev
Download the last Dicom3tools version here and untar it.
Go in the untar folder.
./Configure
make World
sudo make World install
Now, you need to make symbolic link in /opt/dicom3tools :
sudo ln -s /usr/local/bin/dcdump dcdump
sudo ln -s /usr/local/bin/dciodvfy dciodvfy
cd ..
sudo chown -R gazelle:gazelle dicom3tools/
Pixelmed
Build and install
- Launch a build of http://gazelle.ihe.net/jenkins/job/Pixelmed-jar/
- Download Pixelmed-jar-x.x.x-script.zip (example : http://gazelle.ihe.net/jenkins/job/Pixelmed-jar/ws/target/Pixelmed-jar-1.0.1-SNAPSHOT-script.zip)
sudo mkdir /opt/pixelmed
sudo chown gazelle:jboss-admin /opt/pixelmed/
- unzip it in /opt/pixelmed/
- edit /opt/pixelmed/bin/pixelmedValidator.sh, add JAVA_HOME={path to java 7 home}
Upload new jar in nexus
- Download the last Pixelmed version here
- Logged on to http://gazelle.ihe.net/nexus/index.html#view-repositories;thirdparty~browseindex
- Create a pom like this :
<dependency>
  <groupId>com.pixelmed</groupId>
  <artifactId>dicom</artifactId>
  <version>20140326</version>
</dependency>
- Click on “Artifact upload”
- Select GAV definition : From POM
- Select your new pom to upload it
- Add artifacts : sourceFiles.jar and executable.jar
- To finish click on upload artifacts
You can now get your new dependency in the project http://gazelle.ihe.net/jenkins/job/Pixelmed-jar/, do the build and install.